Understanding RC Wheel Adjustment: Camber, Caster, and Toe
Even the best-equipped RC car wearing tires perfectly matched to the terrain will handle poorly if the wheel and tire angles are too far off from the optimum settings. Just like full-size cars, RC models with adjustable, independent suspension allow camber, toe-in, and caster to be precisely set to fine-tune handling. What exactly is RC wheel adjustment and how does it affect handling, you ask? Let’s get into it.
RC Wheel Adjustment: Camber
If you get down to benchtop level and look at your car straight on from the front or rear, you'll note the wheels appear to be vertical or tilted in slightly toward the chassis. What you're seeing is the wheels' camber angle. This angle may be zero degrees (the wheel is perfectly vertical), or the wheel may have up to three degrees of negative camber, meaning the wheel tilts in toward the chassis. A wheel that tilts out would have positive camber, but unless you're adjusting the left front wheel of an oval racer, positive camber is virtually never used.
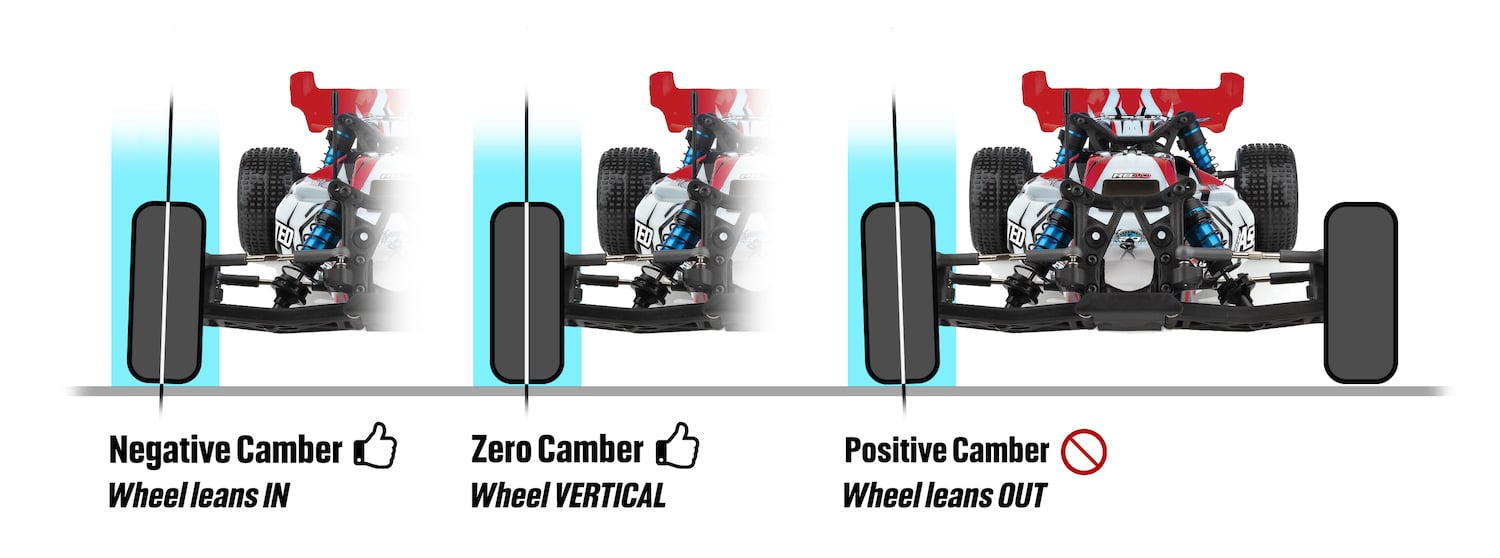
Between zero and three degrees of negative camber is common.
Now, you're probably wondering why the wheels aren't just set vertical, which seems the most sensible. The answer is the tires' contact patches and how they change as the car corners. When a car turns, the chassis leans toward the outside of the turn—and the tires lean with it. A tilted tire has a smaller contact patch than a vertical one, so just when you need more traction to get around the corner, the tilted wheel and tire are generating less traction. By dialing in a little negative camber to compensate for the tilt, the tire gets closer to vertical as the car corners, so you get maximum grip.
And the perfect setting? Well, that depends on your tires, the track conditions, your car, and you. Your manual's suggested angles are a great place to start. When adjusting camber (or any suspension setting), make changes in small increments (even a half-degree can make a difference) and be sure to set each side of the car equally.
Most RC models use turnbuckle links to adjust camber and toe-in, and the toe links may also be referred to as tie rods. Sport model may have non-adjustable links, so the settings are goof-proof, but you can likely get turnbuckle links as an option—check your manual.
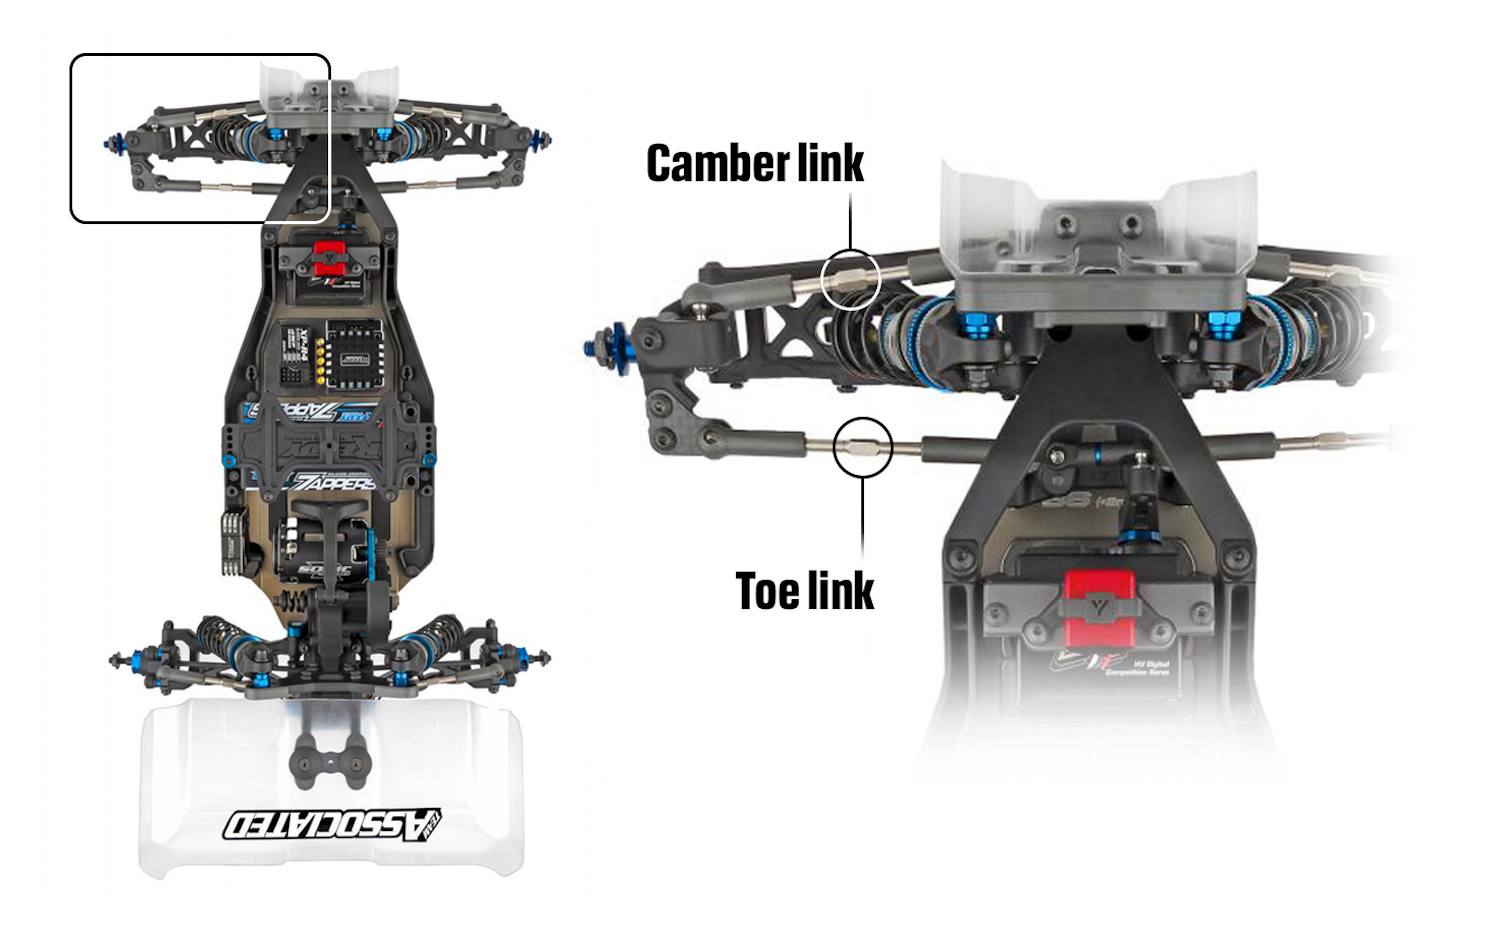
Turnbuckle links have opposing threads, so turning the link will either unthread both rod ends (to lengthen the link) or thread the ends more deeply (to shorten the link). Most models equipped with turnbuckle links also include a wrench that fits them. These are Traxxas' optional TUBES links.
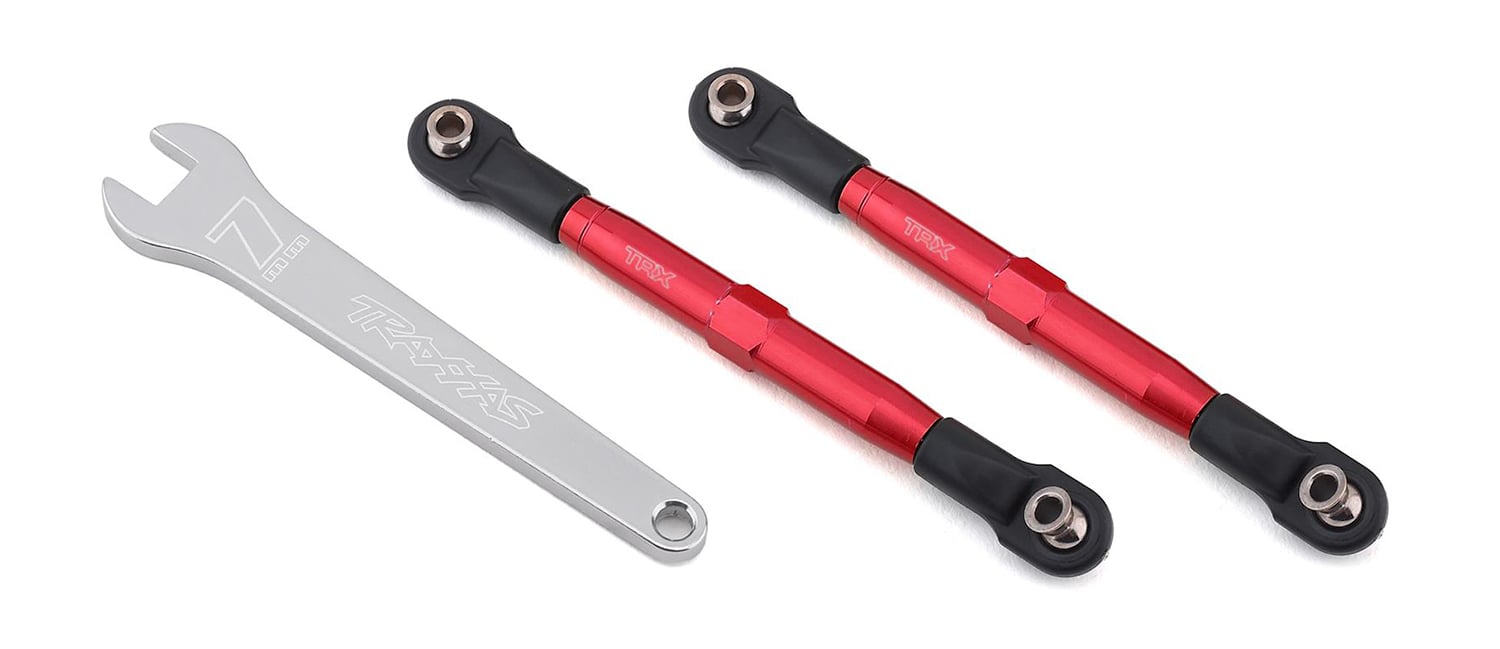
Models with pivot ball suspension don't have turnbuckles. Instead, the pivot balls are threaded in or out of the suspension arms to change the wheel's angle.

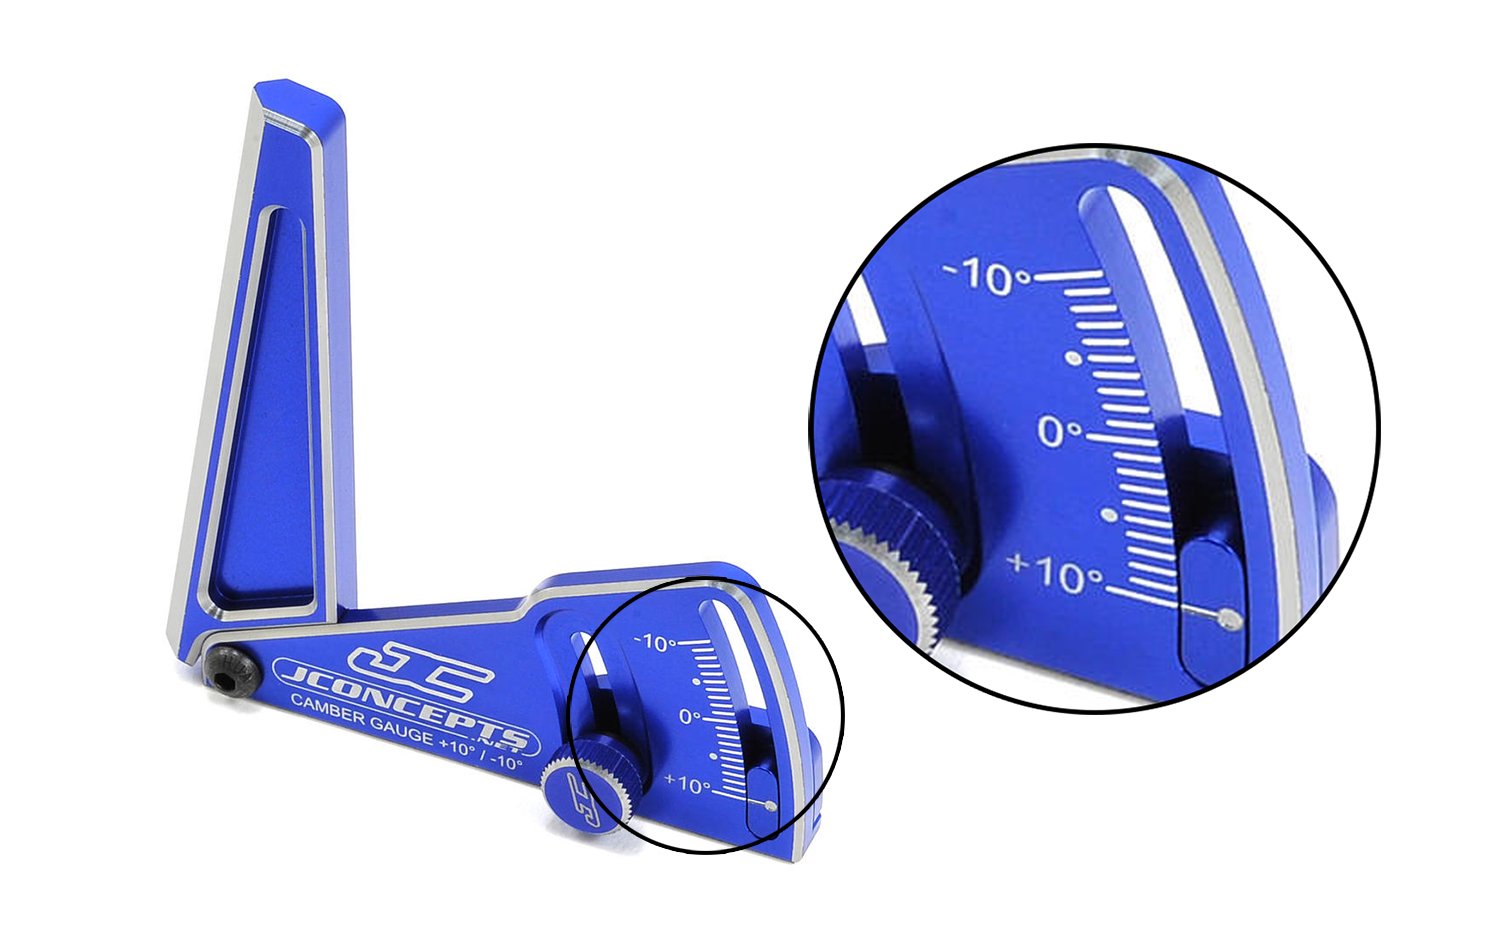
Use a camber gauge to measure your car's settings accurately. RPM's plastic gauge is a classic (and inexpensive) choice, and this aluminum JConcepts gauge is a deluxe model.
RC Wheel Adjustment: Toe
Now take a look at your car from above. The front tires may point straight ahead or in or out slightly. The rear tires may be aimed straight ahead, but they're probably pointing in a bit. As you may have guessed, wheels that point in have Toe In, wheels that point out have Toe Out, and if the wheels are pointing dead ahead, that's Zero Toe. Front toe-in is set by turnbuckle links just like camber, but rear toe is usually a fixed setting that can only be changed by swapping the rear arm mounts or hub carriers.
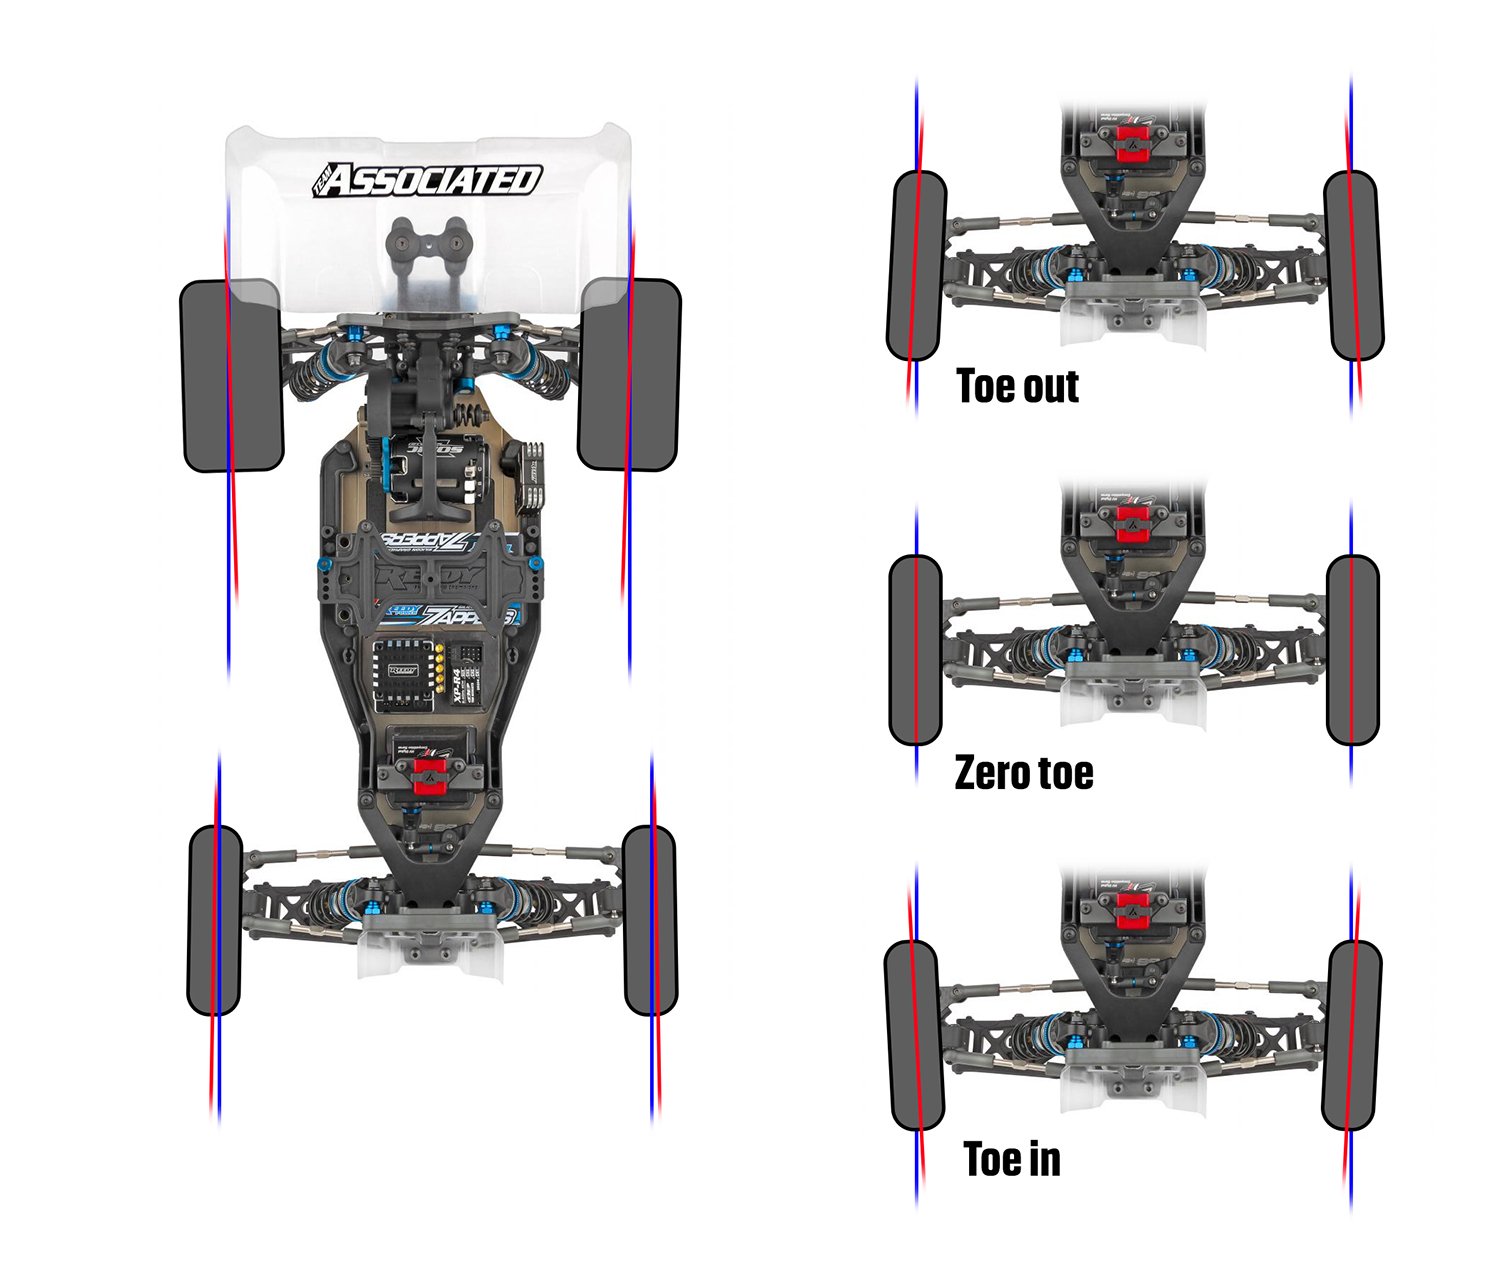
"Toe" refers to the wheels' angles as viewed from above.
Front toe angle is adjusted most frequently and affects how stable the car is on the straights and how aggressively it corners. Most models have a degree or two of toe-in, which improves straightaway stability at the expense of responsive turn-in. As toe-in gets closer to zero or passes zero to become toe-out, the car's turn-in response improves at the expense of stability on the straights. The correct setting is whatever feels best on the track, and most drivers set toe by simply giving the left and right turnbuckles an equal number of turns rather than measuring it precisely. As for rear toe, reducing toe-in will generally improve traction on the straights and make the car feel looser in the corners. Many drivers just stick with the stock rear toe settings, but if you've got the track time to spare, it is worth it to experiment with rear toe.
RC Wheel Adjustment: Caster
Caster is more challenging to visualize than camber and toe, but the illustration below will help. Note that the kingpin the steering arm that pivots on is angled backward. If we measure the angle formed by a vertical line and the kingpin angle, that's the caster angle—thirty degrees, in this case. Caster increases straight-line stability by helping the tires wheels self-center. If we extend the line through the kingpin to the track surface, we see the tire's contact patch is well behind the point where the steering axis intersects the track surface. Just like a furniture caster, the wheel "wants" to align itself behind the steering axis.
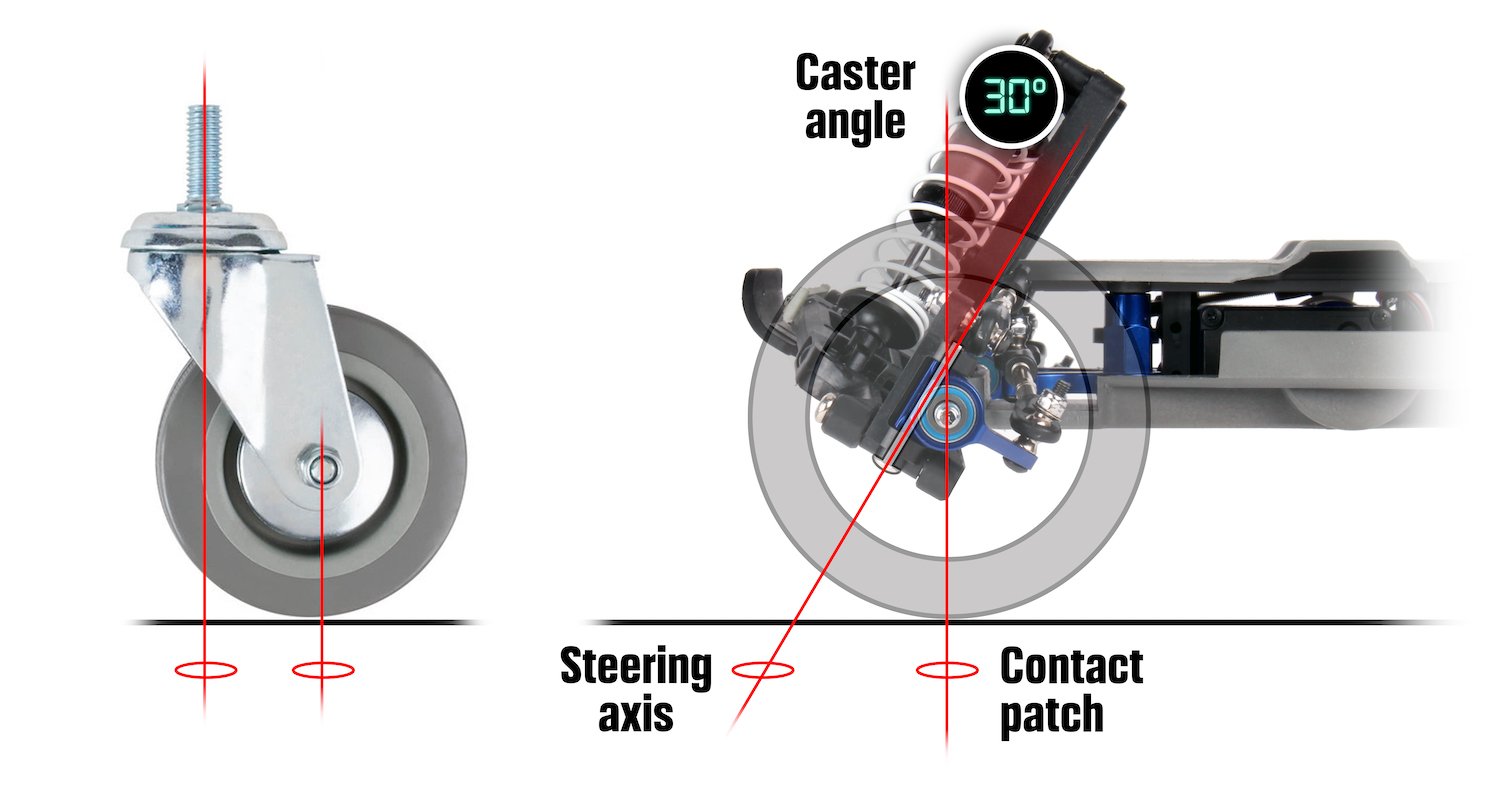
Caster angle refers to the tilt of the steering kingpin, and this angle creates the same self-centering effect as a caster.
Caster angle also affects the tires' camber angles as the wheels steer left and right, which is a more complex conversation. The important thing is what you'll feel at the steering wheel. Greater caster angles increase straight-line stability but make the car more resistant to turning—and vice-versa. 2WD buggies (like the Traxxas Bandit in the illustration) have up to thirty degrees of caster, while 4WD buggies only have around ten degrees. A 4WD model's powered front wheels make it more stable than 2WD, so less caster is required. Most models set steering caster by installing new caster blocks, which are inexpensive. If optional caster blocks are offered for your car, we suggest experimenting with them.
Make Small Changes, Test, and Keep Notes
As you experiment with your car's settings, remember to make changes in small increments and only change one setting at a time. If you adjust multiple things at once, you'll have difficulty telling what's helping or hurting. Instead, give each new setting a good test run to appreciate how it's affecting the car, and keep notes on the setups you like best, so you can easily do a reset if you don't like your changes. And as always—have fun.

